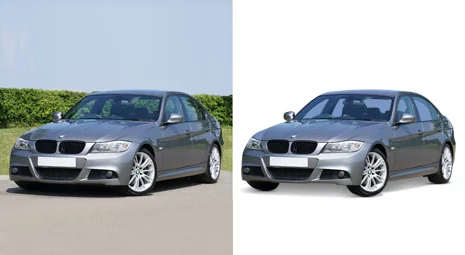
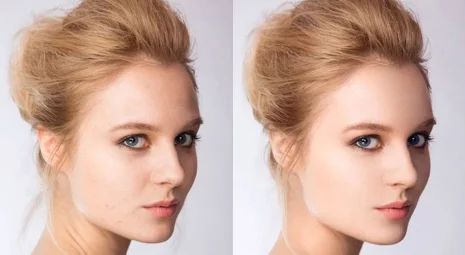
As a dealer of branded cars imposing professional vibes with a fresh new look upon your car creates a lot of positive impact on your product. You can give a perfect visualization of the image of your car by using reflection in Photoshop.
To bring that natural picturization artificially you must know how to make car reflection in photoshop. It gives an outstanding effect of a real car that encourages the buyer to feel like investigating more about the car. So, let's dive deeper into the procedures and steps of creating a
perfect car reflection.
How to procedure Car Reflection in Photoshop?
To attract the concentration of the customer during the post-production period a lucrative image of the car can play the most important role. To make a picturesque reflection of a car you can use the budget-friendly method of photoshop by yourself. The tools and materials you need to use are described below.
The procedures
To make a perfect reflection you must need an upgraded photoshop. Here the procedures are based on Adobe Photoshop CS6. Let's see the steps and try it yourself.
Step 1:
In the very beginning, you have to open the setup Adobe Photoshop and set up all the necessary things. Go to the window and select Work Space. Open all the windows including photos. Open that image and save it with a new name. Select the area that you are going to edit on photoshop.
Step 2:
Now you have to make a worthy combination of lighting, color adjustment, contrast. Be careful to select light and don't choose a much different one as it makes the reflection fake. It's time to select Flatten on the background's layer option.
Step 3:
Here you find an option called Duplicate Layer in Background. Now you have to name the new layer. Click W to activate the Quick Selection Tool menu. At this time select the section of the photo where you want to add reflection.
Step 4:
Now click the surrounding areas of the part you want to make a reflection of. It will make your photoshop trace out the similar areas on that image. If you want to add some more parts you can just add that to the selection. Click at Alt to remove parts from your selection.
Step 5:
To keep all your selection inside just hold Crtl+Shift+I and it marks the things outside. You can easily eliminate these unnecessary things with one click. You must be annoyed by the little eye view of the image. So hide it by clicking on it on the background layer.
Step 6:
Press Ctrl+Shift+N to create
a new layer in between the two-layer of Cut Out layer and the Background layer. Named the layer as Black Fill. ensure the background color is white and the foreground color is black. To fix the gradient from Paint & Bucket Tool click on G. Now click on the image to make sure the Paint Tool is activated. It's the time of removing selection and to do that hold on Ctrl+D. Now click anywhere for the Black fill layer to be filled with Black.
Step 7:
Click on V and work with the Move Tool. Choose Cut Out layer and send the photo part to the upper part of your document. It will make you have a little bit wide space to implement your reflection.
Step 8:
This step is very easy. You just need to have a right-click on the cutout layer and choose Duplicate Layer from that. Now named its reflection. Flip the image by following the given process; Edit,>>Transform>>Flip Vertical. Press on V to activate move action and it will make the two images touch each other barely.
Step 9:
Again, you can do it via another procedure. Drag the image holding the Shift key down to fix the image in position. You can adjust the document size by choosing Images>>Canvas Size. To find out many other necessary icons go to the bottom of the Layers box. Hit on Add Layer Mask. Press on G to activate the paint tool and have a right-click on the image.
Now press on the Gradient Tool and start from the very beginning of the first image. By holding the shift key drag it downwards. Gradually the flipped image Reduces clarity. Just lessen the Reflection layer’s Opacity to 50%.
Step 10:
Now your reflection is ready. It's time to click on the Cut-Out layer and hold the Shift key to select the Reflection layer and pick them off simultaneously. Click on the Link Layers box. It combines the two-layer and you can move that layer as one.
Conclusion:
Adding an authentic reflection is not a very hard task if you know how to Make Car Reflection in Photoshop. Here you are provided the all the instructions and necessary steps to follow so that you can do it yourself.
FAQ:
There are some more things that people often want to know. The answer to those questions are bellowed:
What are tools do I need to use to make a car Reflection in Photoshop?
To make a car reflection in photoshop you need to use some virtual tools and layers like workspace settings, the Move Tool, Cut Out layer. Duplicate Layer.
How to make a mirror effect in Photoshop?
To make a mirror reflection you have to click on the layer where you mind to flip. Choose edit and from here go to
Transform. Then select the Flip Horizontal. Hit on the Layer Visibility icon to hide the new layer. Through the bottom layer, you can activate it. Mark up the area where the image has been seen in the mirror.