Step by Step Ghost Mannequin Photography & Editing Guide
Product Photography is perhaps the most important marketing material, especially for apparel industries. Breathtaking pictures, 3D and 2D illustrations, and good orientation can attract your potential consumers.
Have you ever wondered how does levitate pictures of clothing products are shot? It’s no wizardry, however, you can master the art as well! This is Ghost Mannequin Photography. This is the complete guide for the best Ghost Mannequin Photography you could find online.
So, buckle up folks! We will be covering all the essentials from how to click the photos, arrange lightings, and post-processing on Photoshop. The Step by Step guide will help you master the skill in no time!
Ghost Mannequin Photography Essentials
Now, making something levitate is not easy. We don’t belong to the wizarding world of Harry Potter. So, ‘Win gar diumleviOhhhsa!’ won’t work. Sorry, Hermione.
But with the help of good and clever photography skills and some magic wands in Photoshop, we can create levitating clothing photographs.
To start things off, we will have to shift the focus to photography. Big dogs of the clothing industry spend thousands on each photoshoot. Whether it is with a bunch of world-class models or with precious mannequins, the outcome is stunning.
I am pretty sure that you want the same for your venture. But, spending thousands is not on the cards, as of now. But, with a little bit of clever management and orientation, you can get a stunning result as well.
Photography: The Core Element!
No matter what you desire, you cannot achieve that unless you have good content. It implies in every sector of your work. However, ghost mannequin photography can be done with okay-okay photos. Rest assured, we will be discussing easy steps, so it will be comfortable for all photographers and editors.
Now, there are certain aspects that you need to consider while clicking the next big shot. First of all the lighting. Following that, we have the background orientation. And lastly, the angle of attack.
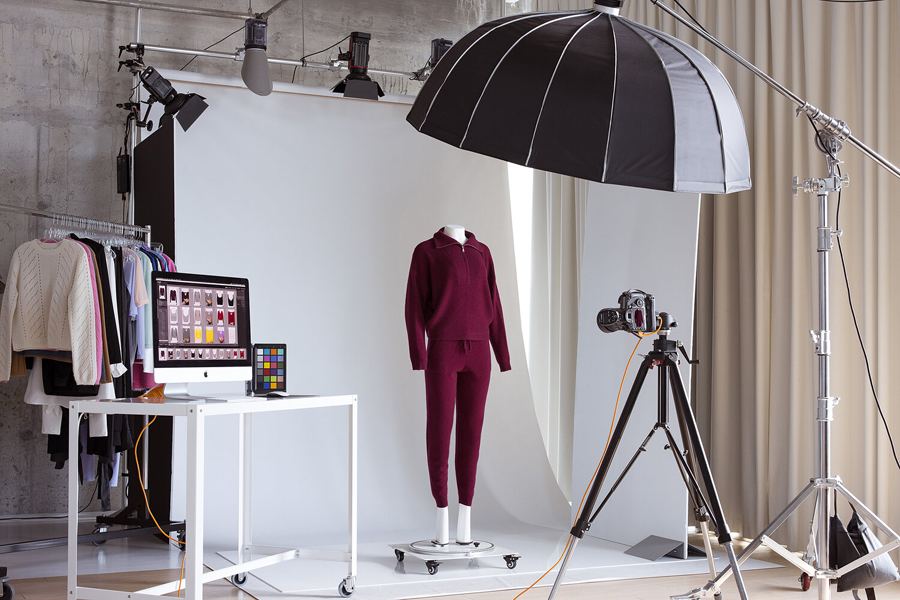
Lighting: How to Do it Right!
Now, lighting is an important phase of photography. The better the lighting posture, the more the precision in post-production. One thing that you will have to ensure is that your room or studio will have to have the perfect blend of light and shadow.
There is a lot of tips and tricks to achieve the perfect light. First of all, place the mannequin in parallel with your camera. Your main source of light should be aligned with the camera in a parallel motion as well.
Now, some of you might be wondering, why do we need to have the lights on the same angle? It’s because we need sharp edges. Straight light will create sharper edges compared to angular lighting. Sharper edges will allow you to extract the clothing from the background without hustle.
Now, coming down to shadowing. Keeping your studio dim or dark will help you extract the full potential of focus lights. If you have other bright sources of light, it may tamper with the angle of attack. We will be discussing more on it.
Background: The Star of the Show!
Now, it is very important to choose the background wisely and efficiently. First thing’s first, the backdrop will have to be non-reflective. The last thing you possibly want is the reflection of light burning down the image.
However, the background should be solid colored. Monochromic backdrops are the best. Because we will be extracting the object from the background. So, solid monochromic is easy to peel.
Now, the lighting should be hitting the mannequin up straight. It will create sharp edges, and the background will work as a differentiator.
The angle of Attack: Know Your Limits!
The angle of attack is perhaps the least discussed topic in photography. How you position your background, your lights, and your camera should be the prime concern in every photography.
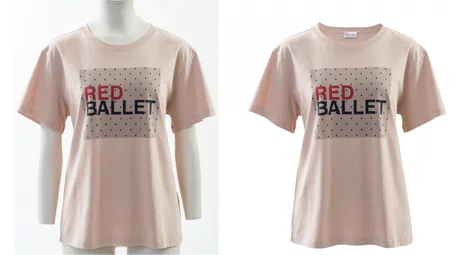
However, while working with a mannequin, especially in intend to ghost it, you will have to take numerous photos. The twist is, all the orientations will have to align in the same line.
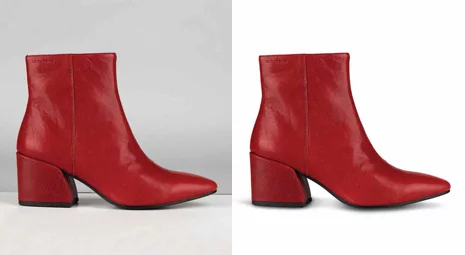
One pro tip is to maintain a small marking frame or marking dots to position the material. It will save a lot of hustle in post-production.
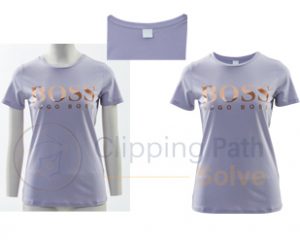
See Example:
Post-Production: How to Ghost on Photoshop
Product Photography is mandatory in today’s market. It will allow you to showcase your product in places where those are not available physically. Not to forget marketing and brand promoting material also includes photographs of the actual product.
Your potential customers will have to be impressed with your presentation of the product. I have seen many great products doing average sales where average products hitting wonders. All of this is just because of clever and well-oriented photography.
Now, after photography, post-editing is equally important. And when you are doing ghost mannequin photography, post-production is where all the magic happens. Lucky for you, we will be describing all the processes, tips, and tricks in a step-by-step formation.
The steps at a glance:
Setting Up the Background Layer and Front Layer
Using Selection Tools on the Background
Eliminating The Mannequin
Masking Layers
Creating Selections of the Interior
Orienting The Interior
Using Shadows
Applying Suitable Backgrounds
Step One: Setting Up Layers!
One thing you will have to realize is that we will be selecting and eliminating a lot of particles from the picture. So, missing a mark will surely create problems in the finished items.
So, to eliminate this problem, take another layer and save it as background. A pro tip, make the background black if your product is a lighter color. And make the background white when you are working with a darker color.
Make the picture front layer. It will be much easier to edit. The background will assist with the flaw detection.
Step Two: Using the Magic Wand!
First, you will have to make sure that the front layer is selected. Then you will have to select the background area of your picture. If you have used a solid or monochromic background, you will have a clean section. Having disoriented background will create a great number of problems.
Now, to select the portions, you will be needing a selection tool. This selection tool will be a magic Wand. You will easily find the tool in the tool ribbon of Adobe Photoshop.
However, if you are not able to find that, don’t panic. It is hidden under the quick selection panel. Now, as you have taken the wand, click right on to the background. There will be a horizontal ribbon on the top. When you have selected the area, you will have to mask it.
To do that, observe the horizontal ribbon. On the far right, you will see “Select and Mask”. By selecting this option, you will be able to delete the unwanted background, yet keeping the subject well intact.
You then simply press the delete or backspace button. You will end up having a clean and nearly perfect subject with no background.
Sometimes, due to lighting or any other exposure-oriented problem, the edges might come out to be rough. You can easily fix this with the Refine Edge Brush from the brush tool.
Step Three: Selecting the Mannequin
As we have used the magic want to automatically select the background and mask it, we will do the same with the mannequin. But the biggest challenge of this will be rectifying the edges. As the mannequin is close to the clothing, it sometimes gets messy while masking.
One pro tip for beginners is that to the first select as much as the magic wand can select. Then erase the excess with an eraser. Be very steady with your mouse. The more precise and patient you are, the more you get the perfect cut.
Now, after masking, you will be left with lines or the outer edges of the mannequin. I have seen many people leaving the edges. But this is a major flaw in ghosting. It should be erased.
Step Four: Refining the Mannequin
Now, after all the efforts, there will be the visible part of the mannequin. You will have to erase those as well. For that, first, select the front layer. Then you will have to select a mask. You will find that at the bottom of the layer window.
After selecting that, it will elevate the subject from the background. Take the brush and select a white color. And then go through the areas where the mannequin is still visible. In this way, you will be able to refine the image and make it completely ghostly.
Step Five: Fixing the Interior
After removing the mannequin, the first thing you realized is that as if you have only cut out the front part of the clothing. In order to ghost it completely, you will have to add on the interior as well.
For that, you will have to take a photograph of the same dress without the mannequin. By doing this, you will get the interior parts.
Now, open the image in another window. Select the interior part and crop it. Take the cropped part and drag it to the main file. Now, place the layer of the cropped interior behind the front layer. Now, place the interior in the back as the orientation of the clothing.
Resize and wrap the cropped interior to match the size and make it more realistic. When you are finished with the work, merge both the layers.
Step Six: Wrap, Clean, and Lock!
Now, certain interiors might be disoriented with the front part. You can easily fix that by wrapping it according to the fabric. To wrap the layer, you will find the Wrap tool in the Edit file option. In the transform dropdown, you will see the wrap tool.
Now refine the edges if needed and bring a cleaner and sophisticated look altogether. When you are satisfied with the outcome, lock the layers.
Step Seven: Darkening Interiors
Now, as you have realized, you will have to darken the interior’s light to make it more realistic. You can do that by readjusting the adjustment curves. You will find that in Image>Adjustments>Curve.
Make the layer darken more to rectify the outcome properly.
Step Eight: Select the Desired Background
Now, as you have completed the final image, lockdown and merge down all the front and interior layers to get the final image. Now, many beginner designers tend to start experimenting on the raw file.
This creates a vulnerable point in the long run. As you are constantly making adjustments, you will have to admit that you are losing the raw image.
If at any point in time, you need the raw image, you will have to undo all the adjustments up till now. So, the best and sensible thing to do is to save a separate file that will contain only the fabric part.
Now, start exploring and make changes to the background, color, and lighting orientations and bring the artist out of you!
Final Thoughts
Certain things will have to be taken care of. The priority of the whole campaign is the photography of the actual product. Then you will have to take care of the orientation and lighting.
Selecting the perfect environment and monochromic background is a must thing to do. Then, always remember to take multiple shots from multiple angles.
If you are doing this for your own business, start being creative with separate angles. If you are working for a client or company, make certain changes and be more creative.
Making a good impression with your post-editing skills is mandatory if you want to be successful. This step-by-step formula will not make you a pro overnight. You will have to maintain your composure and practice more and more to become a complete ace.
So, keep on imagining new ideas and start working on them. You will have fun, I guarantee you that!