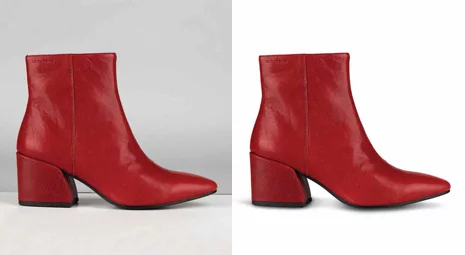
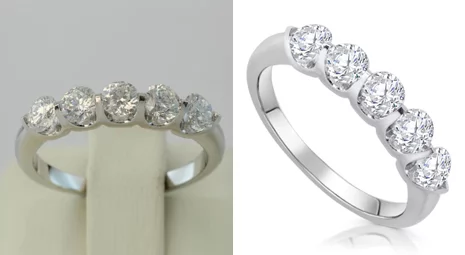
Making a background transparent is a widespread and vital work. As it is an essential work of photoshop, we need to know the proper process. If you are an editor and want to know some valuable skills of photoshop, then this is the right article for you. Making a transparent background of a photo is one of the basic skills of photoshop. This article will tell you how to create a transparent background in Photoshop. So, let’s know the easy and proper way to make a background transparent. We will be using
Magic tool.
Eraser.
And Pen tool.
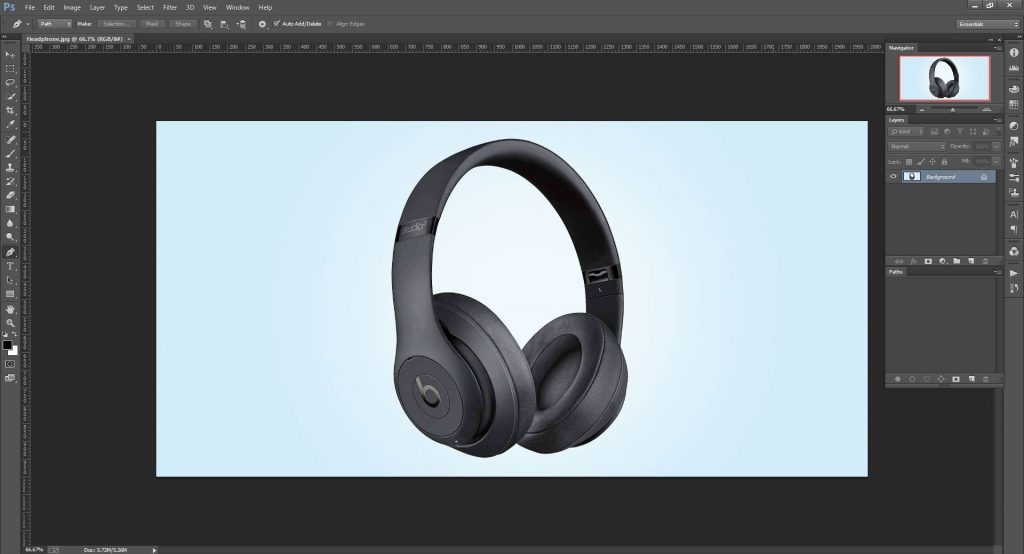
For removing the background and making it transparent. First, you have to open the image on Photoshop from File>Open. If possible, choose PNG images because they show a better result after conversion. Now let’s see the steps and procedures.
1.unlocking the background
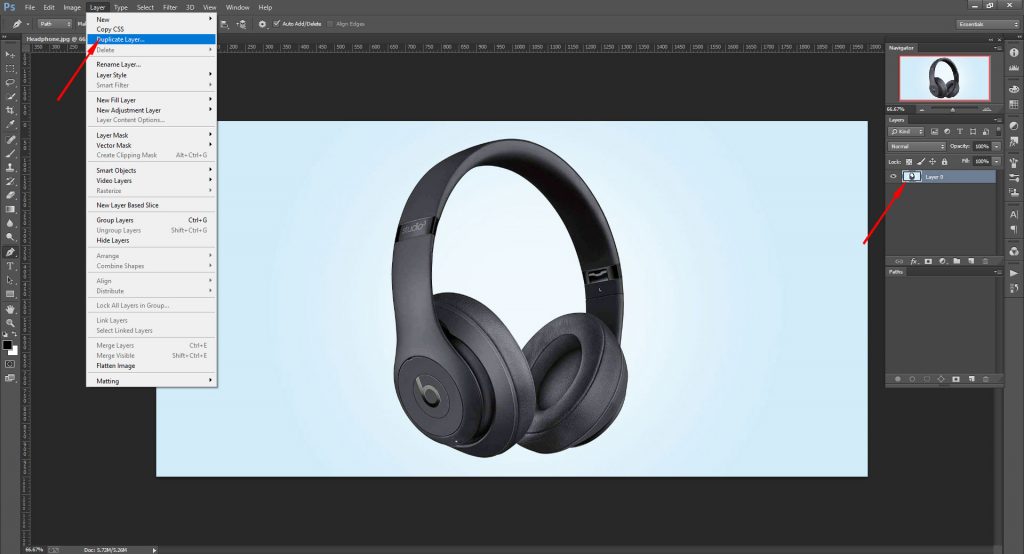
First, you have to go to the layer panel. From the Layers panel, you have to double-click on the background layer. We will see A ’New Layer’ dialogue box that will open asking you to change the layer name. Then you have to set it at default. It will now unlock your background layer. If you delete anything from the Layer, it will be transparent. If you want to change anything from the background layer, it’s better to copy the Layer. You have to go to the top menu and click Layer>Duplicate. It will duplicate the Layer for you. After creating your duplicate layer, you can work on your edits.
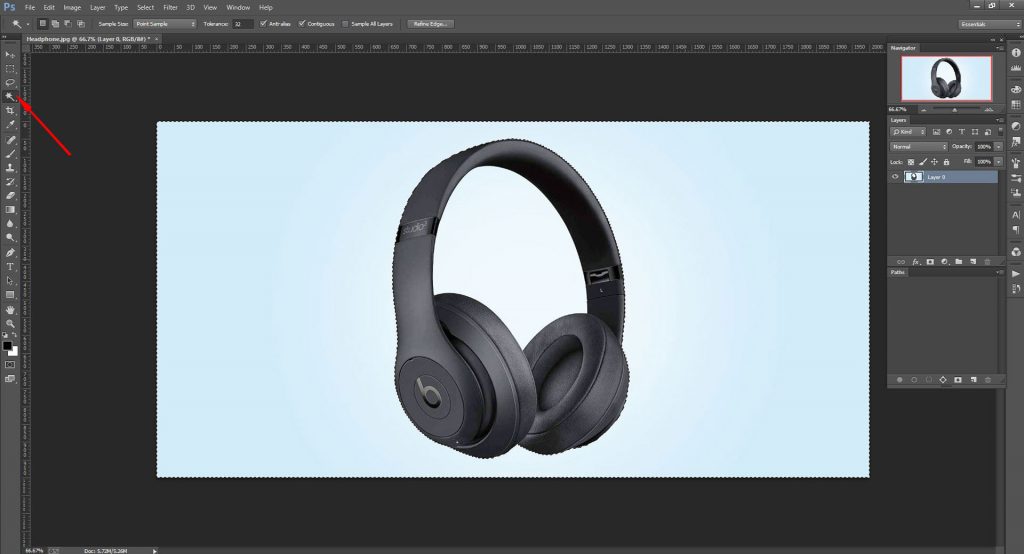
2. selecting the desired object using the magic wand tool
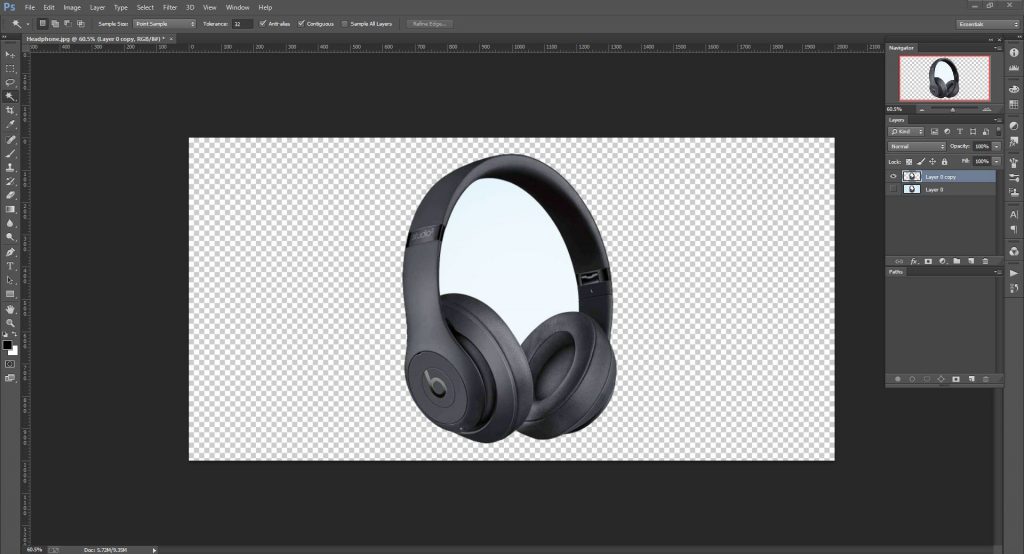
The second step is Selecting the Magic Wand tool from the toolbar. It is located on the left-hand side of the window. The Magic Wand is excellent at making selections in Photoshop. You have just to click and drag on the parts of the background to remove it. After making the selection. you have to press Delete or Backspace on the keyboard to remove the part of the background.
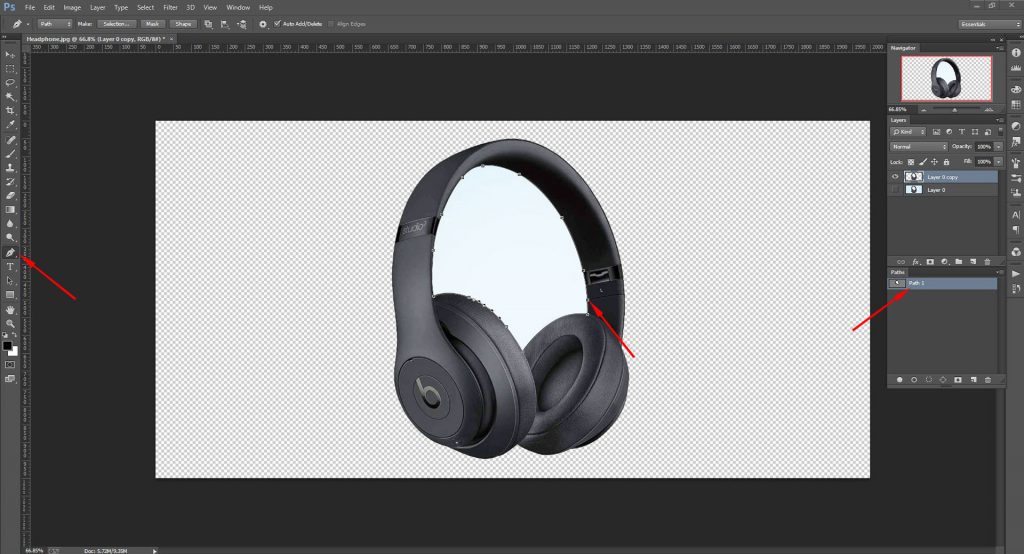
3.selecting inside the object using pen tool
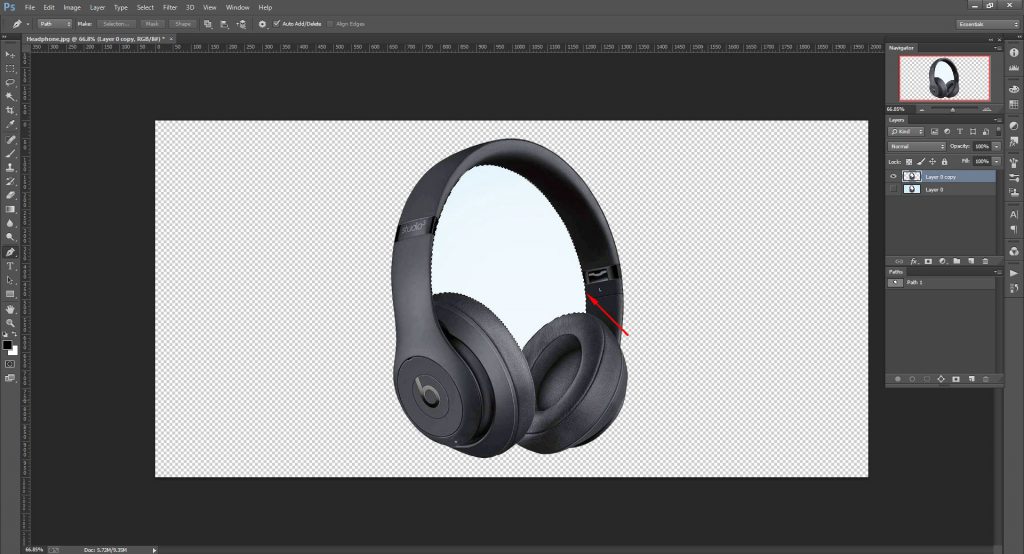
To remove the background inside of an object pen tool is necessary. First, you have to make a path inside the object using Pen Tool. Now you have to click right on the path and select the Make Selections button. After that, you have to press the Delete button to remove the background inside the object.
4.cleaning pixelated parts by eraser tool.
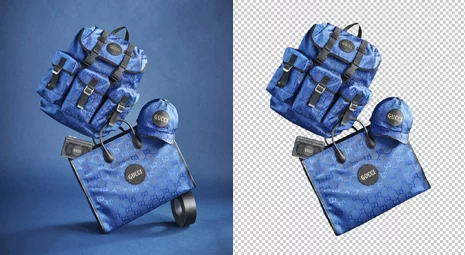
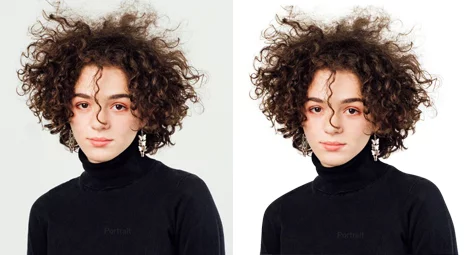
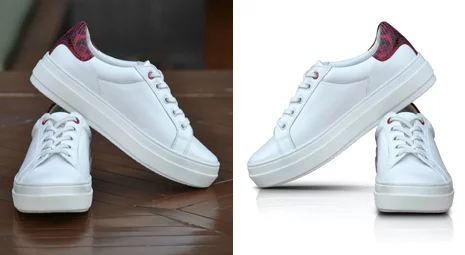
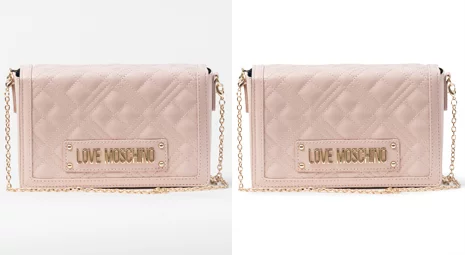
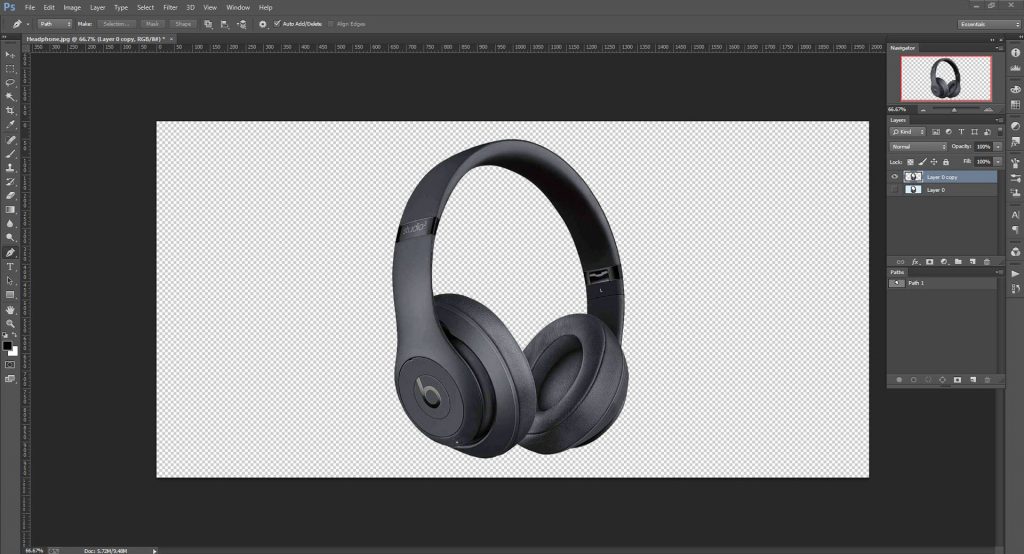
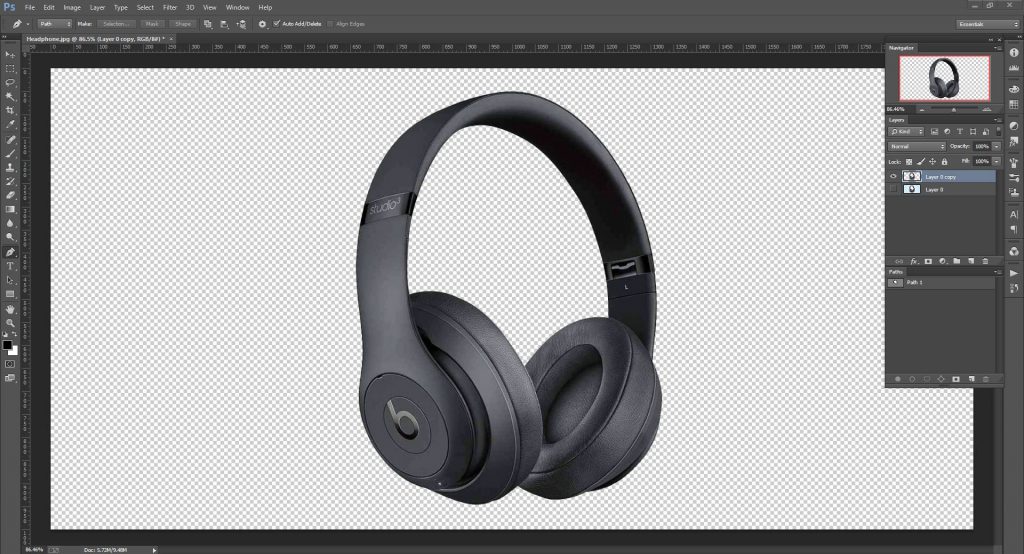
There are always some unwanted parts left behind after background removal. So, you have to use the eraser tool to get rid of them. The Eraser tool is best when it comes to erasing unwanted parts. You can use the eraser tool to give a refined look to your image. The edges and hard-to-reach parts need a touch of the eraser tool. However, using the eraser tool is actually a time-consuming process. But it will get good results and a clean image. You will have the ability to zoom in on the image to see the pixelated parts to clean the background properly. Zooming is always a good ability when it comes to image quality and perfection. After removing the background, you can expect an image like this.The last step is you have to save the image in your desired format. But you will lose transparency if you choose the jpg format. You have to save it as a PNG file to keep the transparency. You have to go to File> Save As and select PNG from the drop-down menu o save the picture as png. In addition, it is actually a good practice to save the File in PSD format. Because it will be easy for you to do any further edits if you have the PSD file.
Why you will need transparent background
Transparent backgrounds will give you some pretty good opportunities. the main of them is the opportunity to bring changes in the visual appearance.
You can customize the pic of your product according to your need. For example, you may have to use the same picture in different places. places like e-commerce, graphical work, or advertisement. You can easily set the background of your subject if it has a transparent background.
To make the perfect contrast and color matching background for the website or other uses.
Transparent background is a must for logos, icons, and other graphic elements. Because these need to place in various backgrounds for different purposes
Conclusion
This tutorial will be helpful for all levels of learners. Because we try to show the most straightforward technique of this work. After reading this, hope it becomes easy for you to do background transplantation . or if you want some more professional work, you can hire a professional photo editor. We will suggest you clipping path solve. If you are looking to hire a professional photo editing service their service will be the best.


 The last step is you have to save the image in your desired format. But you will lose transparency if you choose the jpg format. You have to save it as a PNG file to keep the transparency. You have to go to File> Save As and select PNG from the drop-down menu o save the picture as png. In addition, it is actually a good practice to save the File in PSD format. Because it will be easy for you to do any further edits if you have the PSD file.